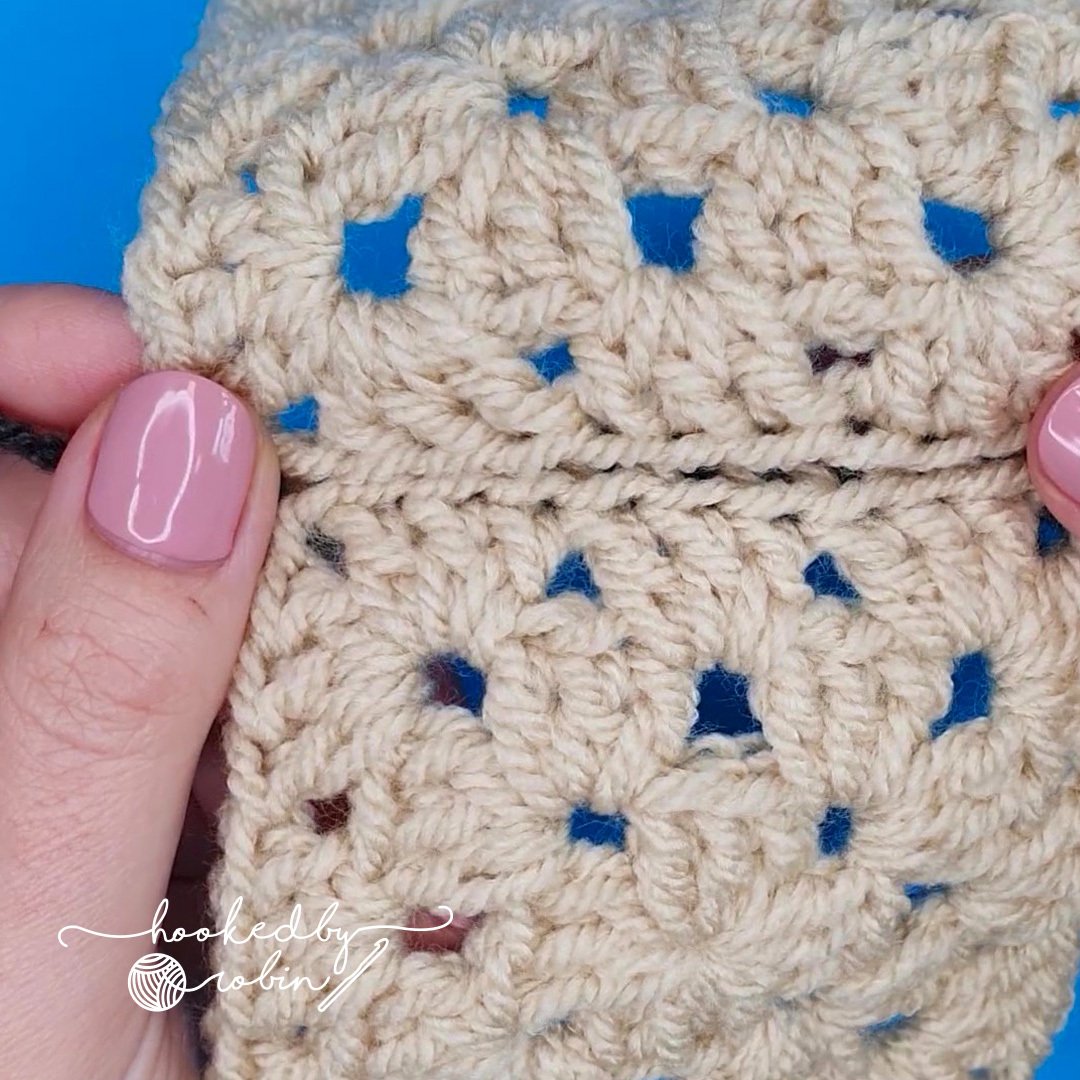
3 EASY Ways to Crochet Squares Together! NO SEWING! [Free Video Tutorial & Written Pattern!]
Hate sewing? Me too! Here are 3 easy ways to CROCHET your squares together 🧶😍 Using simple stitches I will show you step by step how to easily join your crochet together.
Watch the full step by step video tutorial below or alternatively, keep scrolling for the written patterns :)
Pin for later
3 Easy Ways to Crochet Squares Together WRITTEN PATTERN
USA STITCH TERMS
You can use any yarn and hook you would like.
Hook Size(s): according to your yarn
Abbreviations:
• Ch = Chain
• SC = Single Crochet
• Sl St = Slip Stitch
• St = Stitch
First Method: Single Crochet
Pick up 2 squares with the wrong side facing each other. Place them on top of each other and line them up.
Using yarn, and hook create slip knot. Create SC in right corner, going around the Ch space on both squares.
Line stitches up. Insert hook through the back loop of first stitch in the first square, and the back loop of the first stitch of the second square. Create SC.
Repeat going through the back loop through both squares and creating a SC across square.
Once you reach the corner Ch space, work a SC in the Ch space.
Grab your next two square. Wrong side facing each other, and place them on top of each other lining them up.
Continue going through the back loop through both squares and creating a SC across square.
To seam the other direction, you will rotate your squares, attach your yarn in the corner sp. And repeat the steps above.
Once you reach your middle seam, Ch 1, SC in Ch space, and continue working SC in back loop of each square across.
Method 2: Slip Stitch
Have your squares laid out flat.
Create slip knot, insert hook under back loop of your corner chain in two squares. Attach yarn and pull through. Create Slip Stitch.
Keep working yarn under squares.
Lining your squares up, going through the back loop of the first stitch on both squares, create a slip stitch.
Going through the back loop on each square, create a slip stitch. Repeat until you reach the next Ch sp.
Work in back loop of the Ch in both squares, create slip stitch.
Grab your next squares. Pick up the back loop of the ch sp on both squares. Create slip stitch.
Lining up the squares, create slip stitch in each stitch going through both squares in the back loops.
Repeat the same steps for the other direction.
Once you reach your seam from the other direction, Ch 1, and skip over seam and continue across creating slip stitches in the back loop.
Method 3: Slip Stitch from the Back
Make Slip knot.
Place your squares so the right side is facing each other.
Insert hook through the front loops of the corner ch, attach yarn.
Insert hook into next stitch through the front loop of the first square, and the front loop of the next stitch of the second square. Create slip stitch.
Going through the front loop of the next stitch through both squares create a slip stitch.
Repeat across, until next Ch sp.
Grab your next squares. Pick up the front loop of the ch sp on both squares. Create slip stitch.
Lining up the squares, create slip stitch in each stitch going through both squares in the front loops.
Repeat the same steps for the other direction.
Once you reach your seam from the other direction, Ch 1, and skip over seam and continue across creating slip stitches in the front loop.
If you spot any errors in the written pattern please do let me know.
Happy Crocheting!
Robin


![3 EASY Ways to Crochet Squares Together! NO SEWING! [Free Video Tutorial & Written Pattern!]](https://images.squarespace-cdn.com/content/v1/5e18a0efb9904526f1bedb80/1668706477543-OISH3WG5QB0GD5GRWI0V/blog_joining_granny_squares.jpg)


![Crochet Log Cabin Granny Triangle Shawl [Free Video Tutorial & Written Pattern!]](https://images.squarespace-cdn.com/content/v1/5e18a0efb9904526f1bedb80/1669308175450-K7I736XI3EG9CCTT1FAS/blog_log_cabin_granny_shawl.jpg)
![Crochet Tiny Heart [Free Video Tutorial & Written Pattern!]](https://images.squarespace-cdn.com/content/v1/5e18a0efb9904526f1bedb80/1667224792087-FP8KSCC5997R7X04V9PU/blog+tiny+heart.jpg)
![Crochet Puff Post Square [Free Video Tutorial & Written Pattern!]](https://images.squarespace-cdn.com/content/v1/5e18a0efb9904526f1bedb80/1682536602511-BN5J2ZP5J6WCL5O7CC0F/blog_puff_post_square.jpg)
![Crochet Popcorn Floral Granny Square [Free Video Tutorial & Written Pattern!]](https://images.squarespace-cdn.com/content/v1/5e18a0efb9904526f1bedb80/1718011142266-5OLHDZW4J1NBUN81EUID/blog+popcorn+floral+square.jpg)
![Crochet Polka Dot Square [Free Video Tutorial & Written Pattern!]](https://images.squarespace-cdn.com/content/v1/5e18a0efb9904526f1bedb80/1722432441687-JGS19JN6N0V6NUPA4GZF/BLOG+POLKA+DOT+SQUARE.jpg)