Crochet Spider Stitch Written Pattern [Free Video Tutorial & Written Pattern!]
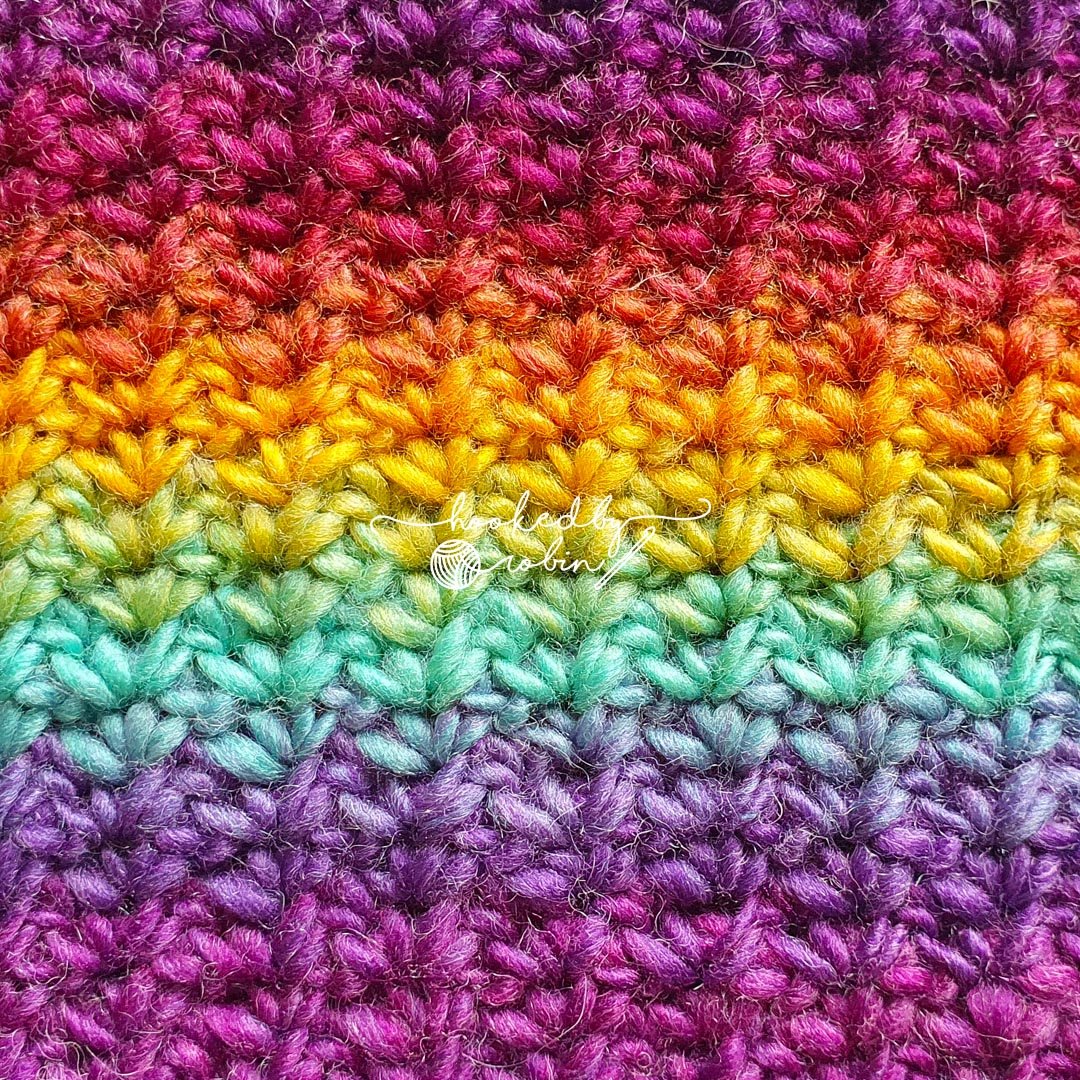
Learn how to Crochet the Spider Stitch! This is a lovely dense, sturdy yet pretty stitch - with delicate star stitch like detailing, without the fuss!
The perfect stitch for washcloths, crochet hats, dishcloths or if you use a larger hook, it gives lovely drape for crochet scarves and blankets. In the video I will show you step by step how to crochet the Spider Stitch AND how to keep your edges nice and straight with no flaring😀 Keep reading for the written pattern.
The Spider Stitch is like a single crochet version of the V-Stitch.
Watch the full step by step video tutorial below or alternatively, keep scrolling for the written pattern :)
Pin for later
Crochet Spider Stitch WRITTEN PATTERN
USA STITCH TERMS
Hook Size(s): according to your yarn (preferably a hook size bigger or more than recommended to get nice drape. If you want a dense fabric - for example, for a washcloth - then use the recommended hook size that your chosen yarn recommends)
The yarns I used:
🧶 Yarn & Hook information: Yarn in thumbnail: Ice Yarn Lana Bella with a 5mm Hook
Yarn in tutorial: Perran Yarns Hand dyed Merino Silk Blend Aran weight yarn with a 6mm Hook (shade: "Toffee Apple")
Abbreviations:
• Ch = Chain
• SC = Single crochet
• Rep = Repeat
• St = Stitch
SPECIAL STITCH
Spider Stitch = single crochet, chain 1, single crochet (sc, ch1, sc) all into the same stitch
Foundation Row: Ch an odd number for your desired width.
Row 1 SET UP ROW: In the third ch from the hook, make 1 SC.
SC in each ch along. Make a note of how many SC you make for this set up row as you will need to remember this number for the final row
Row 2: Ch 2 and turn.
Make Spider Stitch in the next st. Skip a st, Spider Stitch in the next. Repeat * skip a st, Spider Stitch in next* across the row until you have 1 SC remaining. Finish the row with 1 SC in the Ch2 space at the end of the row. (the 2 chains you skipped on the set up row)
Rows 3-onward: Ch2 and turn.
Make Spider Stitch in the Ch1 space of the Spider Stitches from the row below. Repeat this across the row and end with 1 SC in the ch2 space at the end of the Row.
Final Row:
Once you have reached the desired length, ch1 and turn.
1 SC in-between the SC and the Spider Stitch from the row below. Slip Stitch into the Ch1 Space of the Spider Stitch.
1 SC in-between the sets of Spider Stitches, Slip Stitch into the Ch1 space of the next Spider Stitch. Repeat until the end of the row.
Finish with 1 SC into the Ch2 space.
You should have the same number of stitches (SC & Slip Stitches) as the total number of SC you made on the Set Up Row 1.
Fasten off with a Ch1 and cut the yarn.
Pin for Later
If you spot any errors in the written pattern please do let me know.
Happy Crocheting!
Robin


![Crochet Spider Stitch Written Pattern [Free Video Tutorial & Written Pattern!]](https://images.squarespace-cdn.com/content/v1/5e18a0efb9904526f1bedb80/1653402435894-Y674K8USCB4ZHJ1FYEXX/blog+spider+stitch.jpg)


![Crochet Picasso Yarn Scarf [Free Video Tutorial & Written Pattern!]](https://images.squarespace-cdn.com/content/v1/5e18a0efb9904526f1bedb80/1652955337692-QSTZVI06KY1KXLT4U1S5/blog+picasso+yarn+scarf+1.jpg)
![Crochet Larksfoot Stitch Written Pattern [Free Video Tutorial & Written Pattern!]](https://images.squarespace-cdn.com/content/v1/5e18a0efb9904526f1bedb80/1652780030691-J2Z0K304VGZIBIDGMOZB/blog+larksfoot.jpg)
![Crochet Cluster Stitch [Free Video Tutorial & Written Pattern!]](https://images.squarespace-cdn.com/content/v1/5e18a0efb9904526f1bedb80/1663064024057-RDIDBNCLNOQE49K5W04U/blog+cluster+stitch.jpg)
![Crochet Sieve Stitch [Free Video Tutorial & Written Pattern!]](https://images.squarespace-cdn.com/content/v1/5e18a0efb9904526f1bedb80/1696512727380-WJ29P9Z5ZKT1MZR5D27A/blog+sieve+stitch.jpg)
![Crochet Wattle Stitch [Free Video Tutorial & Written Pattern!]](https://images.squarespace-cdn.com/content/v1/5e18a0efb9904526f1bedb80/1719673009157-9PBOJW92SF5SJFK6BMKR/blog+wattle+stitch.jpg)